Nothing says free software like being able to run the software that you rely on using your own computer. The Cloud is just someone else’s computer.
Using Projectify on your own computer isn’t only free as in free beer. You can customize, extend, study, redistribute, and use Projectify and reclaim your digital freedom (according to the terms of the AGPL used in Projectify).
Projectify is free as in free speech.
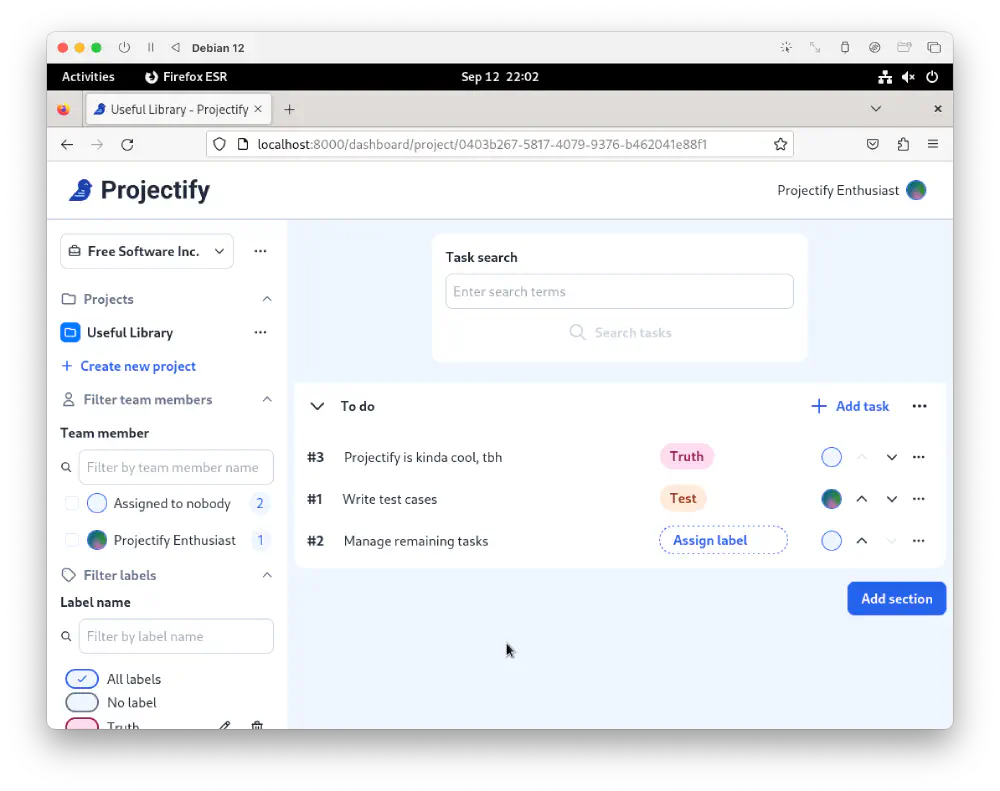
Screenshot with Firefox showing the Projectify dashboard. Firefox runs in a Debian virtual machine. Open in new tab (full image size 107 KiB)
This is a tutorial on how to install and run Projectify on a Debian 12 computer using only free software, common off the shelf packages.
Prerequisites
To follow these instructions, make sure that you are familiar with setting up servers in Debian using systemd. Even if you don’t have much experience with Debian or system: you can get far by asking questions. You are more than welcome to reach out.
You need the following software versions on your Debian machine to run Projectify:
- Debian 12 bookworm on
aarch64orx86_64 - PostgreSQL version
15.8 Node.jsversion18.19.0- Python version
3.11.2 - Caddy version
2.6.2 pipxversion1.1.0- Poetry version
1.8.3 - Redis version
7.0.15 - Projectify release
2024.8.20from August 20, 2024
The versions used here are the current package versions available in Debian 12, as of Sep 13, 2024.
Projectify configuration
The goal is to be able to access Projectify on your computer’s browser using the following address:
http://localhost:8000
Furthermore, you are going to configure the frontend and backend server to be available under the following addresses:
- Frontend running on
http://localhost:8001 - Backend running on
http://localhost:8002
The reverse proxy needs to redirects requests to the following backend addresses at
http://localhost:8002:
- Backend administrator on
http://localhost:8002/admin/*tohttp://localhost:8000/admin/* - Backend WebSocket API on
http://localhost:8002/ws/*tohttp://localhost:8000/ws/* - Backend JSON API on
http://localhost:8002/*tohttp://localhost:8000/api/*
Prerequisite installation
In this step, you are going to install the required Node.js, Python 3, pipx, PostgreSQL, Redis,
and Caddy versions to run Projectify.
Install the required software by running the following commands in a Bash terminal session:
# Update package index
sudo apt update
# Upgrade outdated packages
sudo apt upgrade -y
sudo apt install -y nodejs npm python3 python3-dev \
    postgresql libpq-dev pipx caddy redis
Install Poetry using pipx:
pipx install poetry
Confirm that you’ve installed all tools correctly by querying their versions.
nodejs --version
npm --version
python3 --version
psql --version
caddy version
redis-cli --version
pipx run poetry --version
You should see the following output:
v18.19.0
9.2.0
Python 3.11.2
psql (PostgreSQL) 15.8 (Debian 15.8-0+deb12u1)
2.6.2
redis-cli 7.0.15
Poetry (version 1.8.3)
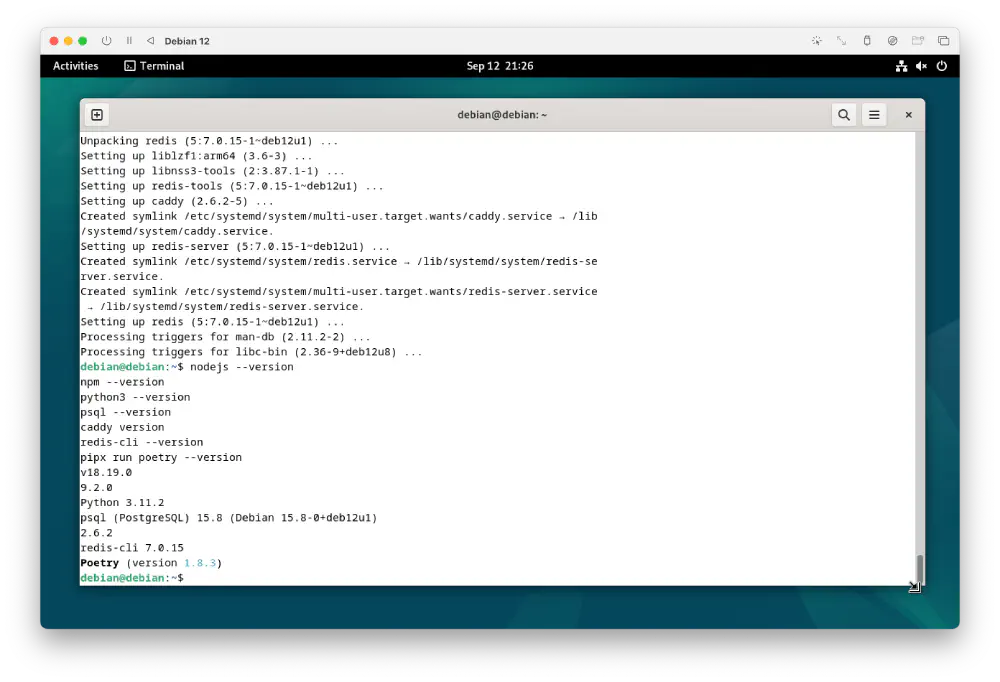
Screenshot showing all dependencies installed correctly Open in new tab (full image size 123 KiB)
Setting up the Projectify user and database
Set up a projectify user account and group to run all Projectify
processes. The user has their home in /var/local/projectify/home:
sudo useradd --system \
  --shell /usr/sbin/nologin \
  --create-home \
  --home-dir /var/local/projectify/home \
  projectify
Make sure that the projectify user can access the projectify PostgreSQL database
by running the following commands:
sudo -u postgres --login createuser projectify
sudo -u postgres --login createdb projectify --owner=projectify
Make sure that /var/projectify belongs to the projectify user by
running the following command:
sudo chown projectify:projectify /var/local/projectify
How to retrieve the source code
In this step, you are going to unpack the source code for Projectify in /opt/projectify. Any
other directory works fine as well, as long as you adjust all paths in the
following instructions.
Download the release tar bundle from GitHub and make it available to the
projectify user using the following commands run in the same terminal.
sudo mkdir /opt/projectify
sudo chown projectify:projectify /opt/projectify
Create a Bash session for the projectify user with the following command:
# From here we run commands as the projectify user
sudo -u projectify bash
# Go into our own home directory
cd $HOME
Unpack the release bundle using the following commands:
# Make sure that you are now the projectify user
# The following command should tell you "projectify"
whoami
# Download release into a temporary folder
cd $(mktemp -d)
wget https://github.com/jwpconsulting/projectify/archive/refs/tags/2024.8.20.tar.gz
# Unpack into /opt/projectify
tar -x -f 2024.8.20.tar.gz \
  -C /opt/projectify -zv \
  --strip-components=1
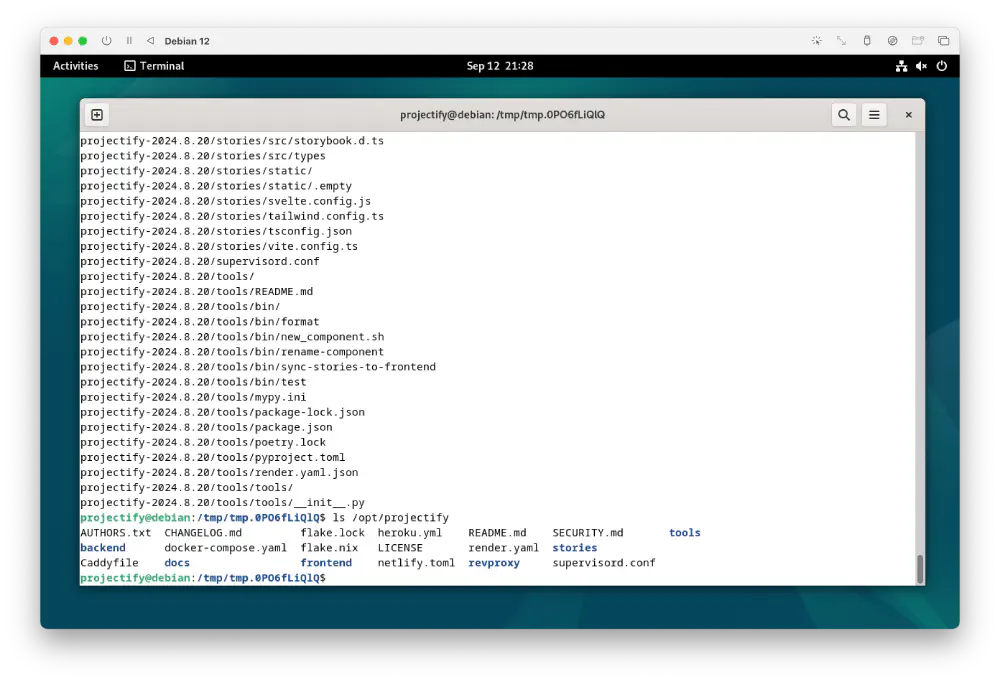
Screenshot showing the source bundle unpacked in the correct directory Open in new tab (full image size 158 KiB)
Building the Projectify frontend
Navigate into the frontend directory and install prerequisites:
# Assuming that we are still the `projectify` user:
cd /opt/projectify/frontend
npm clean-install
# Temporary fix for aarch64:
npm install sharp
Configure the build-time variables for the frontend:
export VITE_WS_ENDPOINT=/ws
export VITE_API_ENDPOINT=/api
export VITE_PROJECTIFY_DOMAIN=localhost
export VITE_GIT_COMMIT_DATE="$(date -Idate)"
export VITE_GIT_BRANCH_NAME=2024.8.20
export VITE_GIT_COMMIT_HASH=2024.8.20
export PROJECTIFY_FRONTEND_ADAPTER=node
export NODE_ENV=production
Finally, build the frontend:
npm run build
The complete build is available in /opt/projectify/frontend/build.
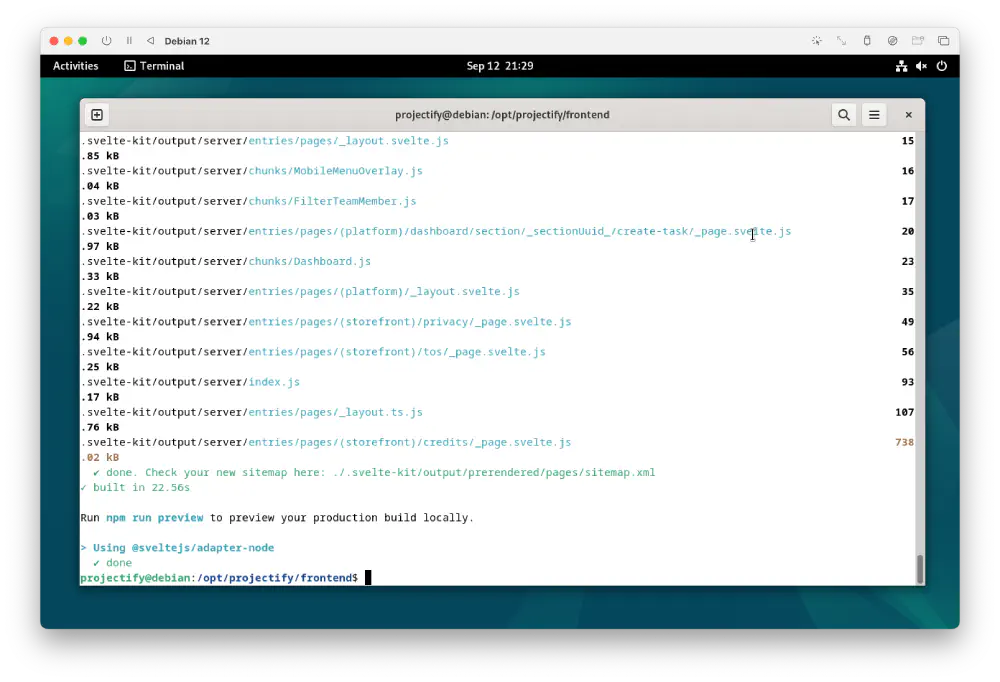
Screenshot of SvelteKit finished the frontend build Open in new tab (full image size 154 KiB)
Building the Projectify backend
Proceed by retrieving the Projectify backend Python package dependencies and run the following commands:
cd /opt/projectify/backend
# Patch pyproject.toml to support stock Debian Python 3.11.2
sed -i -e 's/python = "~3.11.6"/python = "\^3.11.2"/' pyproject.toml
pipx run poetry lock --no-update
pipx run poetry install
The virtual environment contains the gunicorn and celery executable which
are responsible for starting the Django server and background worker.
To determine the full path of gunicorn and celery, run the following
command:
pipx run poetry run which gunicorn celery
While writing this tutorial, Poetry showed the following path, consisting of
the location of the virtual environment and the binary bin/gunicorn itself.
/var/local/projectify/home/.cache/pypoetry/[...]/bin/gunicorn
/var/local/projectify/home/.cache/pypoetry/[...]/bin/celery
Verify that running gunicorn works, even outside of the current Poetry
virtual environment:
/var/local/projectify/home/.cache/pypoetry/virtualenvs/projectify-Hx-n8LwU-py3.11/bin/gunicorn --version
When you invoke gunicorn with the preceding command correctly, you should
see the following output in your terminal.
gunicorn (version 22.0.0)
Later steps use these full paths to define the backend and background worker systemd service files.
Collect all static files using ./manage.py collectstatic and store them in
/var/local/projectify/static using the following commands:
# This settings module is used exclusively to collect static files
export DJANGO_SETTINGS_MODULE=projectify.settings.collect_static
export DJANGO_CONFIGURATION=CollectStatic
export STATIC_ROOT=/var/local/projectify/static
pipx run poetry run ./manage.py collectstatic --no-input
Once Django has collected all static files correctly, you should see the following output:
WARNING:root:No DATABASE_URL environment variable set, and so no databases setup

173 static files copied to '/var/local/projectify/static', 499 post-processed.
Database migration
Before you can start the Projectify backend, you have to populate its database. This step uses the database that you’ve created in Setting up the Projectify user and database.
The command to populate the schema in Django is ./manage.py migrate.
Django calls schema population database migration.
To run this
command correctly, you need to set the necessary environment variables. Without
these, Django can’t start up.
Set these variables by using the following Bash commands:
# Ensure we are still in /opt/projectify/backend
cd /opt/projectify/backend
export STRIPE_ENDPOINT_SECRET=
export STRIPE_PRICE_OBJECT=
export STRIPE_SECRET_KEY=
export STRIPE_PUBLISHABLE_KEY=
export MAILGUN_DOMAIN=
export MAILGUN_API_KEY=
export FRONTEND_URL=http://localhost:8000
export ALLOWED_HOSTS=localhost
export REDIS_URL=redis://localhost:6379/0
export DJANGO_SETTINGS_MODULE=projectify.settings.production
export DJANGO_CONFIGURATION=Production
export DATABASE_URL=postgres://%2Frun%2Fpostgresql/projectify
export SECRET_KEY=migrate-key-do-not-use-anywhere-else
With these environment variables set, run the following to perform the actual migration:
pipx run poetry run ./manage.py migrate
The database migration finishes correctly and you should see a long stream of “OK” messages like so:
[...]

  Applying workspace.0052_alter_workspaceboard_options... OK
  Applying workspace.0053_task_read_only_task_number_and_more... OK
  Applying workspace.0054_rename_deadline_task_due_date... OK
  Applying workspace.0055_rename_deadline_workspaceboard_due_date_and_more... OK
  Applying workspace.0056_alter_label_options... OK
  Applying workspace.0057_workspaceuserinvite_redeemed_when... OK
  Applying workspace.0058_rename_workspaceboardsection_section_and_more... OK
  Applying workspace.0059_rename_workspaceboard_project_and_more... OK
  Applying workspace.0060_alter_workspaceuser_role... OK
  Applying workspace.0061_rename_workspaceuser_teammember_and_more... OK
  Applying workspace.0062_remove_task_unique_task_order_and_more... OK
  Applying workspace.0063_alter_section_order_with_respect_to... OK
  Applying workspace.0064_alter_label_color... OK
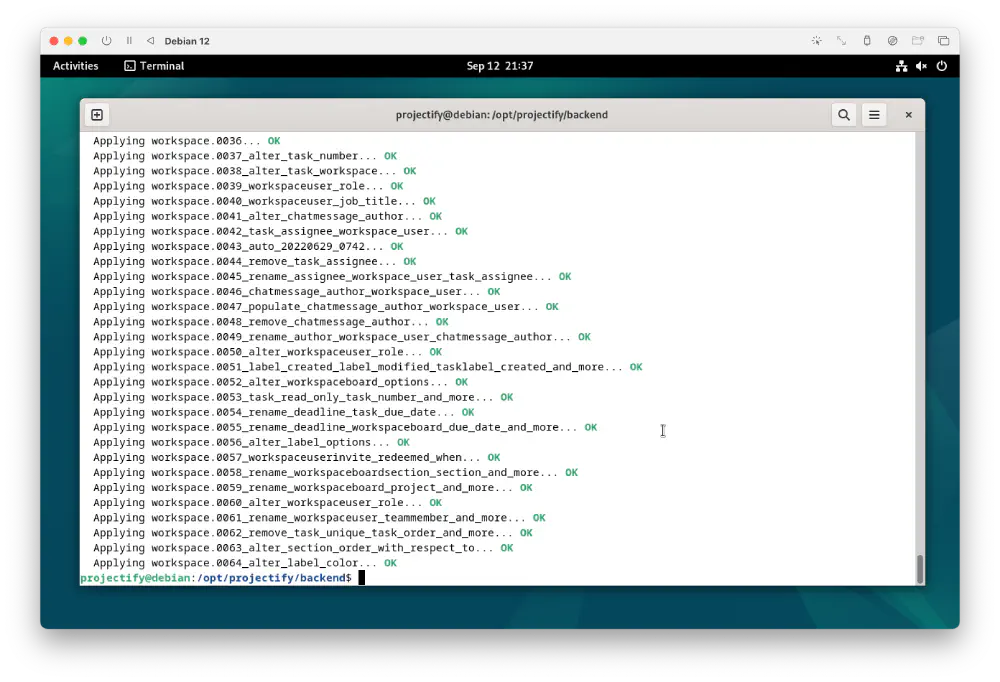
Screenshot of completed Django database migration using ./manage.py migrate
Open in new tab
(full image size 189 KiB)
Initial user creation
To log in into Projectify and access the administration panel, you need to create a so called superuser. The easiest way to create a superuser is by using the Django shell from the terminal.
In the same Bash terminal, open a Django shell using the following command:
pipx run poetry run ./manage.py shell
Inside the Django shell, create a user by typing or pasting the following commands:
from projectify.user.services import internal
internal.user_create_superuser(
    email="admin@localhost",
    password=input("password> "),
)
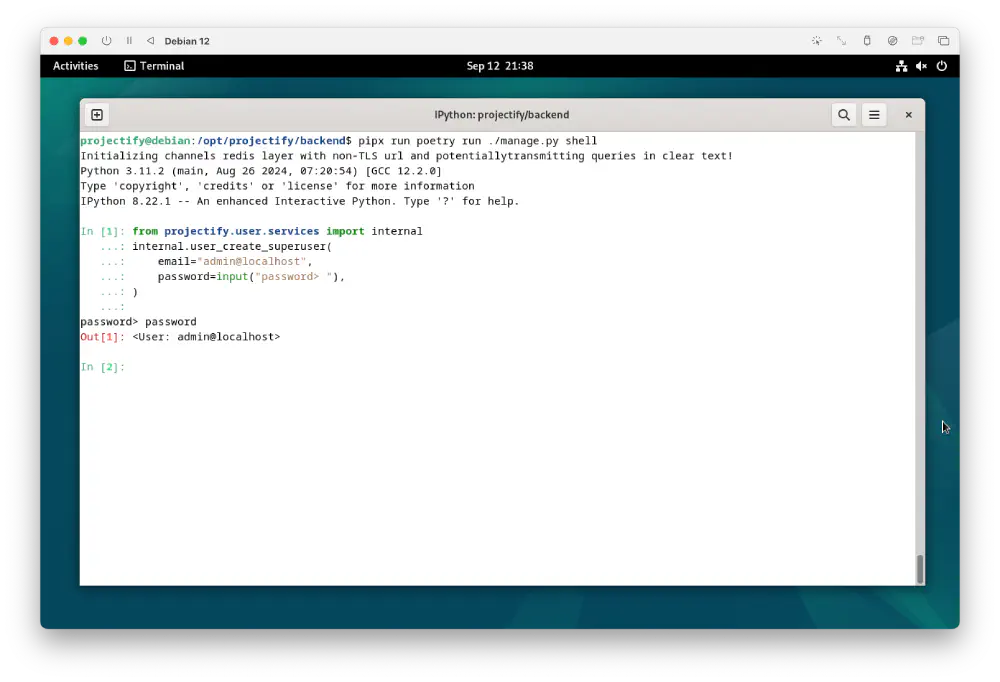
Screenshot of first user being successfully created in Django shell Open in new tab (full image size 101 KiB)
This command creates a user with the email address admin@localhost. The command
asks you to enter a password after a prompt saying password> . You can
adjust the email address to your liking.
Once you’ve created the user, you should see something like the following output:
Initializing channels redis layer with non-TLS url and potentiallytransmitting queries in clear text!
Python 3.11.2 (main, Aug 26 2024, 07:20:54) [GCC 12.2.0]
Type 'copyright', 'credits' or 'license' for more information
IPython 8.22.1 -- An enhanced Interactive Python. Type '?' for help.

In [1]: from projectify.user.services import internal
   ...: internal.user_create_superuser(email="admin@localhost", password=input("
   ...: password> "))
   ...:
password> XXXXXXXXXXXXXXXXXXXX
Out[1]: <User: admin@localhost>
Leave the shell by entering exit() and Enter or pressing Ctrl + D.
Creating the service files
To instruct Debian and systemd to automatically run Projectify in the background, you need to create the following configuration files:
Caddyfilefor Caddy in/etc/caddy/Caddyfile: Explained in the Caddy section.backend-envenvironment variable configuration file for the backend and background worker in/var/local/projectify/backend-env. Explained in the Backend section.
Furthermore, you need to create the following systemd service files in
/etc/systemd/system:
projectify-frontend.servicesystemd unit file for the Projectify frontend: Explain in the Frontend sectionprojectify-backend.servicesystemd unit file for the Projectify backend: Explained in the Backend sectionprojectify-celery.servicesystemd unit file for the Projectify Celery background worker: Explained in the Celery section
Caddy
Caddy is already installed in the system and has its own systemd service file created automatically.
Caddy acts as a reverse proxy for the frontend and
backend, rewriting URLs as needed. It writes an access log to
/var/log/projectify/access.log.
Leave the projectify user shell that you have used to run the preceding
commands. You can do so by pressing CTRL+D or typing exit and pressing
Enter. Run the below commands in a normal Bash session with your regular
Debian account.
Now, create a Caddyfile and restart Caddy. The following Bash commands, run in
a regular terminal session, write the Caddyfile and restart Caddy:
# whoami should not say projectify anymore
# Create a log folder for Caddy
sudo mkdir /var/log/projectify
sudo chown caddy:caddy /var/log/projectify
sudo tee /etc/caddy/Caddyfile <<EOF
http://localhost:8000 {
	reverse_proxy /admin/* http://localhost:8002
	reverse_proxy /static/django/* http://localhost:8002
	reverse_proxy /ws/* http://localhost:8002
	handle_path /api/* {
		reverse_proxy http://localhost:8002
	}
	reverse_proxy http://localhost:8001
	log {
		format console
		output file /var/log/projectify/access.log
	}
}
EOF
# Validate configuration
caddy validate --config /etc/caddy/Caddyfile
# Restart caddy
sudo systemctl restart caddy.service
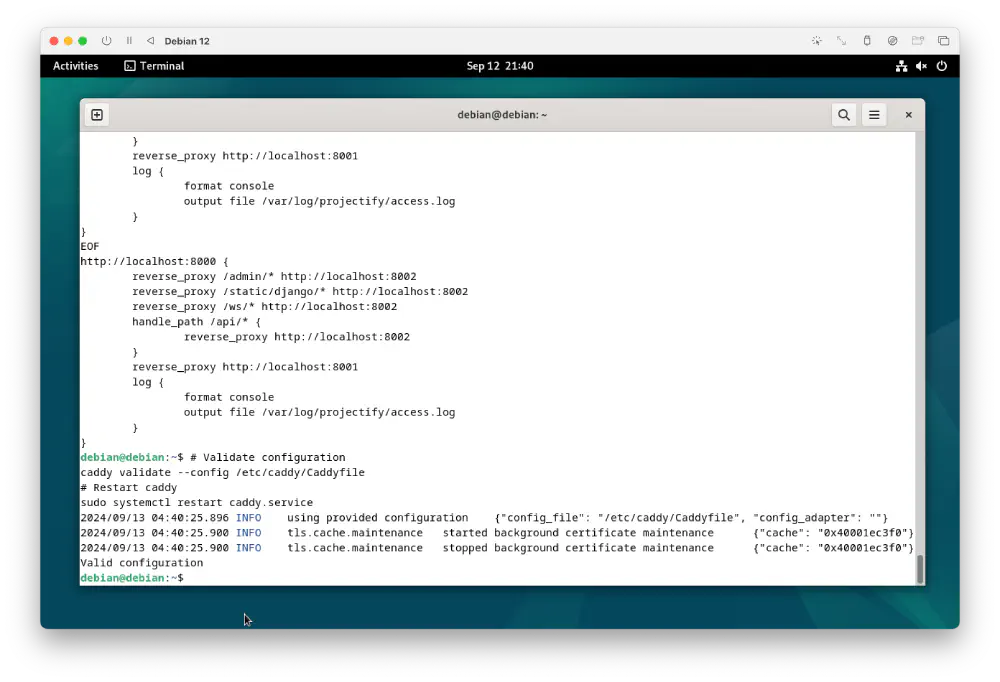
Screenshot showing Caddy validating its configuration file and restarting Open in new tab (full image size 128 KiB)
If you are curious how Projectify on www.projectifyapp.com uses Caddy, please refer to the original Caddyfile in the Projectify repository.
Frontend
All files needed to run the Projectify frontend exist in
opt/projectify/frontend/build. Create a systemd unit file and enable and
start the Projectify frontend using the following commands:
sudo tee /etc/systemd/system/projectify-frontend.service <<EOF
[Unit]
Description=Projectify frontend
[Install]
WantedBy=multi-user.target
[Service]
ExecStart=/usr/bin/node /opt/projectify/frontend/build
User=projectify
Group=projectify
Environment=SVELTE_KIT_PORT=8001
EOF
# Check if the service file is correct
systemd-analyze verify /etc/systemd/system/projectify-frontend.service
# Enable and start the service
sudo systemctl enable projectify-frontend.service
sudo systemctl start projectify-frontend.service
Once you’ve run these commands, verify whether the Projectify frontend has started correctly. To check the Projectify frontend status, use the following command:
sudo systemctl status projectify-frontend.service
If you’ve configured everything correctly, you should see something like the
following output after running the preceding systemctl status command:
projectify-frontend.service - Projectify frontend
     Loaded: loaded (/etc/systemd/system/projectify-frontend.service; enabled;
     Active: active (running) since Thu 2024-09-12 02:23:43 PDT; 1s ago
   Main PID: 61541 (node)
      Tasks: 11 (limit: 4569)
     Memory: 23.3M
        CPU: 103ms
     CGroup: /system.slice/projectify-frontend.service
             \u2514\u250061541 /usr/bin/node /opt/projectify/frontend/build

Sep 12 02:23:43 debian systemd[1]: Started projectify-frontend.service - Projec
Sep 12 02:23:43 debian node[61541]: Listening on 0.0.0.0:8001
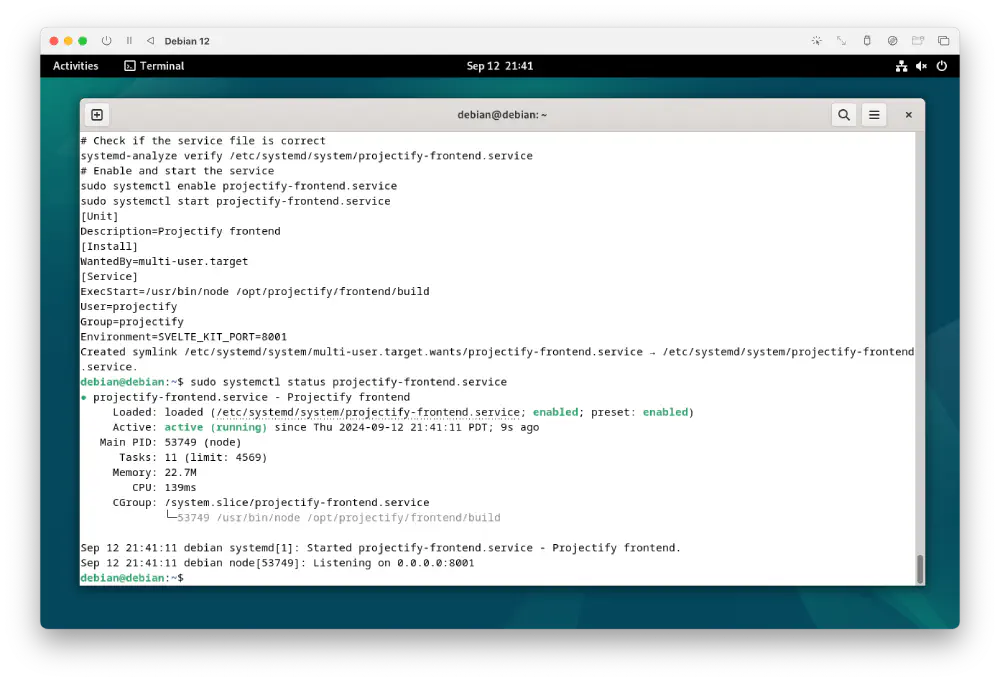
Screenshot of the frontend being up and running as a systemd service Open in new tab (full image size 143 KiB)
Backend
With the frontend configured, you can now move on to configure the backend. To avoid typing
environment variables and especially the secret key in the service file itself,
first create a systemd
EnvironmentFile
compatible configuration file.
Using the following bash commands, you can create the systemd compatible environment configuration file.
It first creates the secret key SECRET_KEY using the command openssl rand
to generate a random and secure key. bash
then puts this secret key and other settings into a file called
/var/local/projectify/backend-env.
sudo tee /var/local/projectify/backend-env <<EOF
STRIPE_ENDPOINT_SECRET=
STRIPE_PRICE_OBJECT=
STRIPE_SECRET_KEY=
STRIPE_PUBLISHABLE_KEY=
MAILGUN_DOMAIN=
MAILGUN_API_KEY=
FRONTEND_URL=http://localhost:8000
ALLOWED_HOSTS=localhost
REDIS_URL=redis://localhost:6379/0
DJANGO_SETTINGS_MODULE=projectify.settings.production
DJANGO_CONFIGURATION=Production
DATABASE_URL=postgres://%2Frun%2Fpostgresql/projectify
SECRET_KEY=$(openssl rand -hex 32)
STATIC_ROOT=/var/local/projectify/static
EOF
# Ensure that only the projectify user can read this file
sudo chown projectify:projectify /var/local/projectify/backend-env
sudo chmod 400 /var/local/projectify/backend-env
With this, you’ve created the environment configuration file for the backend.
Now, add the backend systemd service configuration and
store it under /etc/systemd/system/projectify-backend.service. You can
achieve this with the following command:
sudo tee /etc/systemd/system/projectify-backend.service <<EOF
[Unit]
Description=Projectify backend
[Install]
WantedBy=multi-user.target
[Service]
ExecStart=/var/local/projectify/home/.cache/pypoetry/virtualenvs/projectify-Hx-n8LwU-py3.11/bin/gunicorn \
  --config /opt/projectify/backend/gunicorn.conf.py \
  --log-config /opt/projectify/backend/gunicorn-error.log
User=projectify
Group=projectify
EnvironmentFile=/var/local/projectify/backend-env
Environment=PORT=8002
EOF
Enable and start the backend using the following commands:
# Check the service file for errors
systemd-analyze verify /etc/systemd/system/projectify-backend.service
# Enable and start the Projectify backend
sudo systemctl enable projectify-backend.service
sudo systemctl start projectify-backend.service
Finally, check whether the Projectify backend has started correctly using the following command:
sudo systemctl status projectify-backend.service
If everything worked well, you should see something like the following output:
\u25cf projectify-backend.service - Projectify backend
     Loaded: loaded (/etc/systemd/system/projectify-backend.service; disabled; preset: enabled)
     Active: active (running) since Thu 2024-09-12 02:37:24 PDT; 2s ago
   Main PID: 63285 (gunicorn)
      Tasks: 2 (limit: 4569)
     Memory: 116.0M
        CPU: 529ms
     CGroup: /system.slice/projectify-backend.service
             \u251c\u250063285 /var/local/projectify/home/.cache/pypoetry/virtualenvs/projectify-Hx-n8LwU-py3.11/bin/python>
             \u2514\u250063286 /var/local/projectify/home/.cache/pypoetry/virtualenvs/projectify-Hx-n8LwU-py3.11/bin/python>

Sep 12 02:37:24 debian systemd[1]: Started projectify-backend.service - Projectify backend.
Sep 12 02:37:24 debian gunicorn[63285]: INFO [glogging] ~ Starting gunicorn 22.0.0
Sep 12 02:37:24 debian gunicorn[63285]: INFO [glogging] ~ Listening at: http://0.0.0.0:8002 (63285)
Sep 12 02:37:24 debian gunicorn[63285]: INFO [glogging] ~ Using worker: uvicorn.workers.UvicornWorker
Sep 12 02:37:24 debian gunicorn[63286]: INFO [glogging] ~ Booting worker with pid: 63286
Sep 12 02:37:24 debian gunicorn[63286]: WARNING [production] ~ Initializing channels redis layer with non-TLS url>
Sep 12 02:37:25 debian gunicorn[63286]: INFO [server] ~ Started server process [63286]
Sep 12 02:37:25 debian gunicorn[63286]: INFO [on] ~ Waiting for application startup.
Sep 12 02:37:25 debian gunicorn[63286]: INFO [on] ~ ASGI 'lifespan' protocol appears unsupported.
Sep 12 02:37:25 debian gunicorn[63286]: INFO [on] ~ Application startup complete.
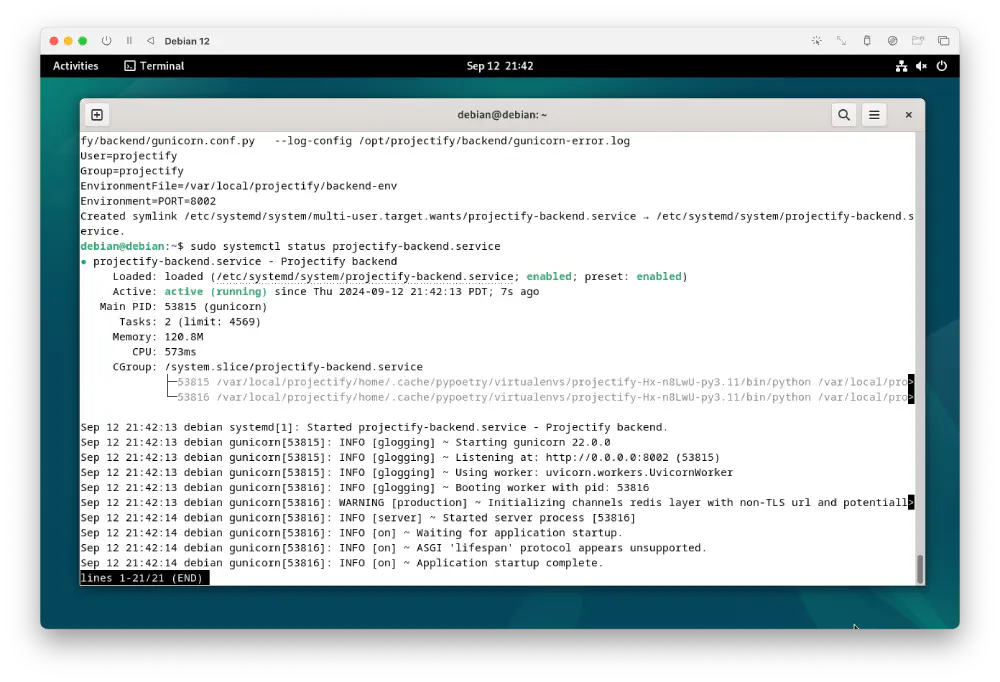
Screenshot showing the Projectify backend running in systemd Open in new tab (full image size 186 KiB)
Celery
The last systemd service to configure is the background worker. Run the
following commands to create, enable, and run the Projectify background worker
projectify-celery:
sudo tee /etc/systemd/system/projectify-celery.service <<EOF
[Unit]
Description=Projectify celery
[Install]
WantedBy=multi-user.target
[Service]
ExecStart=/var/local/projectify/home/.cache/pypoetry/virtualenvs/projectify-Hx-n8LwU-py3.11/bin/celery \
  --app projectify.celery worker --concurrency 1
User=projectify
Group=projectify
EnvironmentFile=/var/local/projectify/backend-env
EOF
# Check the service file
systemd-analyze verify /etc/systemd/system/projectify-celery.service
# Enable and start projectify-celery
sudo systemctl enable projectify-celery.service
sudo systemctl start projectify-celery.service
Finally, to verify whether this step worked correctly as well, query the
projectify-celery service’s status using systemctl status:
sudo systemctl status projectify-celery.service
You should see the following output if everything worked correctly:
\u25cf projectify-celery.service - Projectify celery
     Loaded: loaded (/etc/systemd/system/projectify-celery.service; disabled; preset: enabled)
     Active: active (running) since Thu 2024-09-12 02:39:03 PDT; 11min ago
   Main PID: 63320 (celery)
      Tasks: 2 (limit: 4569)
     Memory: 172.5M
        CPU: 2.406s
     CGroup: /system.slice/projectify-celery.service
             \u251c\u250063320 /var/local/projectify/home/.cache/pypoetry/virtualenvs/projectify-Hx-n8LwU-py3.11/bin/python>
             \u2514\u250063322 /var/local/projectify/home/.cache/pypoetry/virtualenvs/projectify-Hx-n8LwU-py3.11/bin/python>

Sep 12 02:39:04 debian celery[63320]: - ** ---------- [config]
Sep 12 02:39:04 debian celery[63320]: - ** ---------- .> app:         proj:0xffffa14ec190
Sep 12 02:39:04 debian celery[63320]: - ** ---------- .> transport:   redis://localhost:6379/0
Sep 12 02:39:04 debian celery[63320]: - ** ---------- .> results:
Sep 12 02:39:04 debian celery[63320]: - *** --- * --- .> concurrency: 1 (prefork)
Sep 12 02:39:04 debian celery[63320]: -- ******* ---- .> task events: OFF (enable -E to monitor tasks in this wor>
Sep 12 02:39:04 debian celery[63320]: --- ***** -----
Sep 12 02:39:04 debian celery[63320]:  -------------- [queues]
Sep 12 02:39:04 debian celery[63320]:                 .> celery           exchange=celery(direct) key=celery
Sep 12 02:39:04 debian celery[63320]:
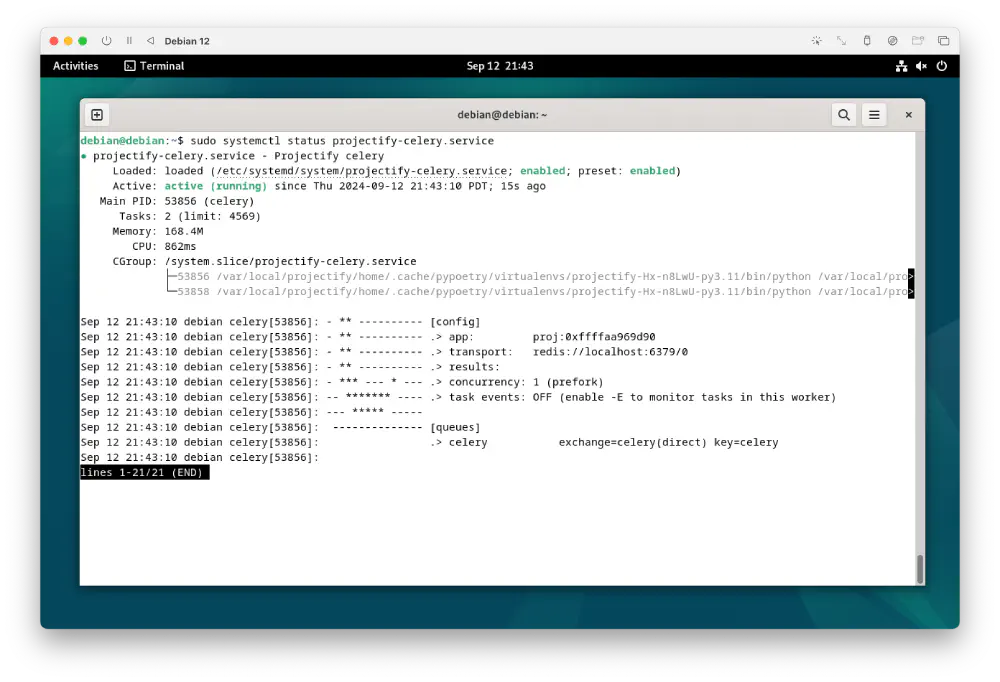
Screenshot of systemctl status confirming that the Projectify celery worker is running
Open in new tab
(full image size 146 KiB)
Logging in and configuring
Projectify is now configured and installed correctly on your Debian computer. You can access Projectify by going to the following address with your browser:
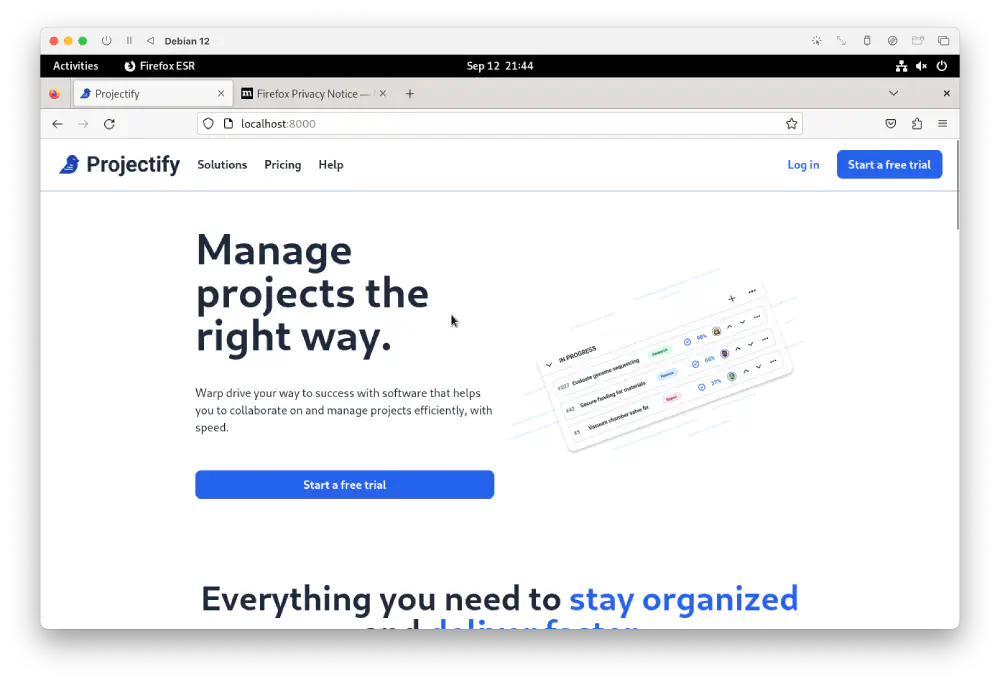
Frontend landing page at http://localhost:8000
Open in new tab
(full image size 114 KiB)
Proceed to the Log In screen by clicking the Log In button. Log in using the
credentials that you have configured when you created your user in the Django
shell before. The next screenshot shows how you can log in using the newly
created admin@localhost email address.
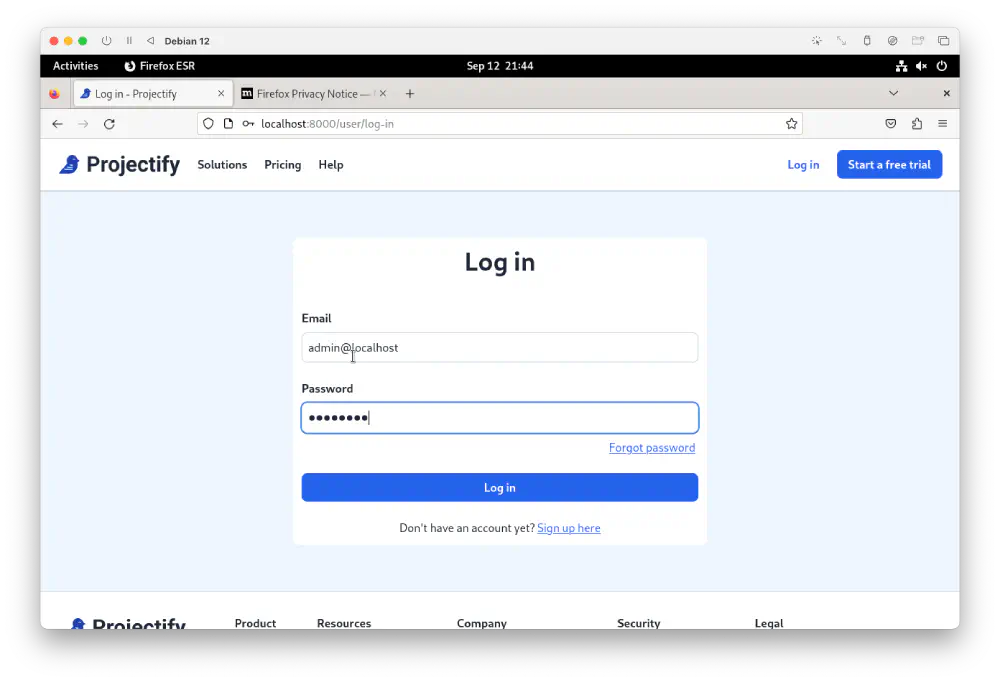
Screenshot showing log in form using the administrator email address Open in new tab (full image size 85 KiB)
Projectify then redirects you to the onboarding process where you can create your first workspace.
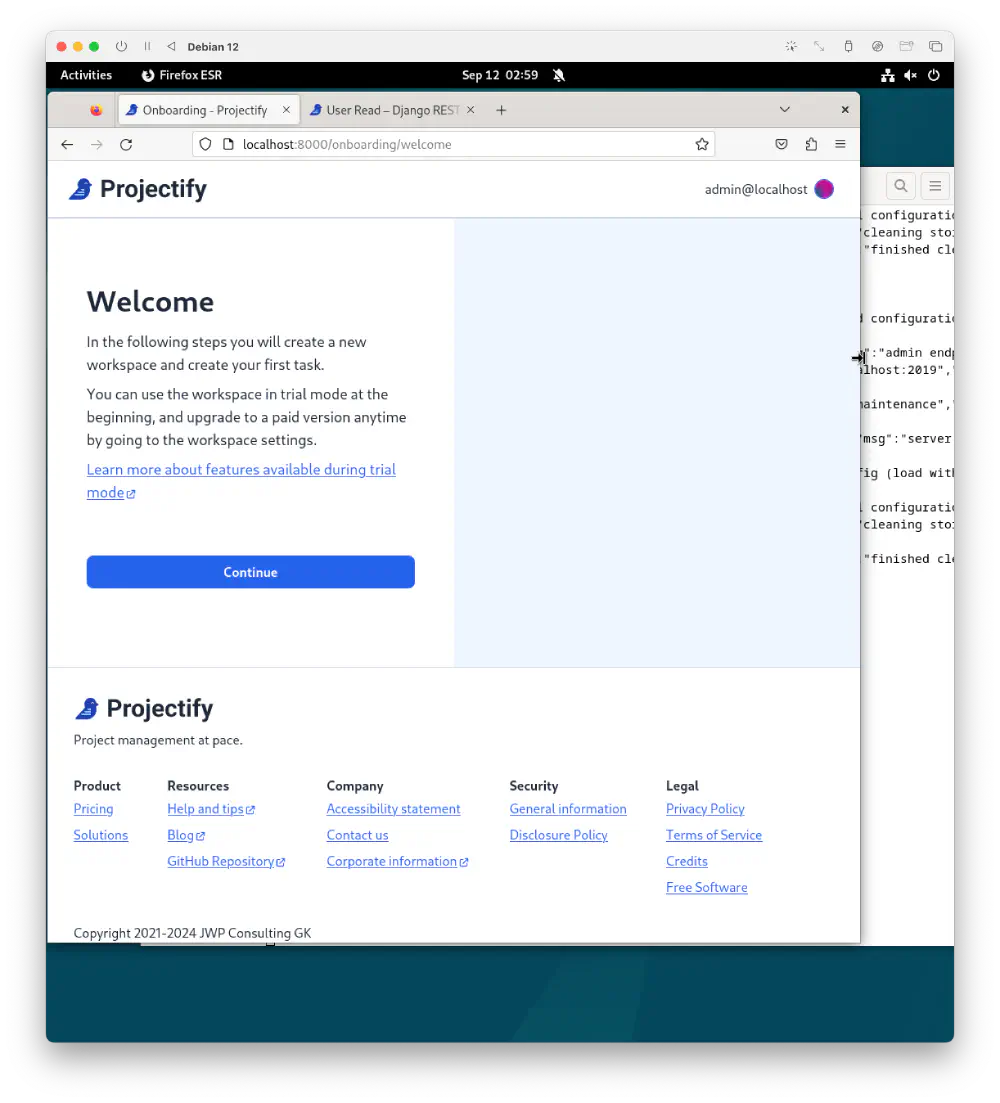
Screenshot of onboarding screen after having logged in successfully Open in new tab (full image size 139 KiB)
Go through the onboarding flow and create your first workspace.
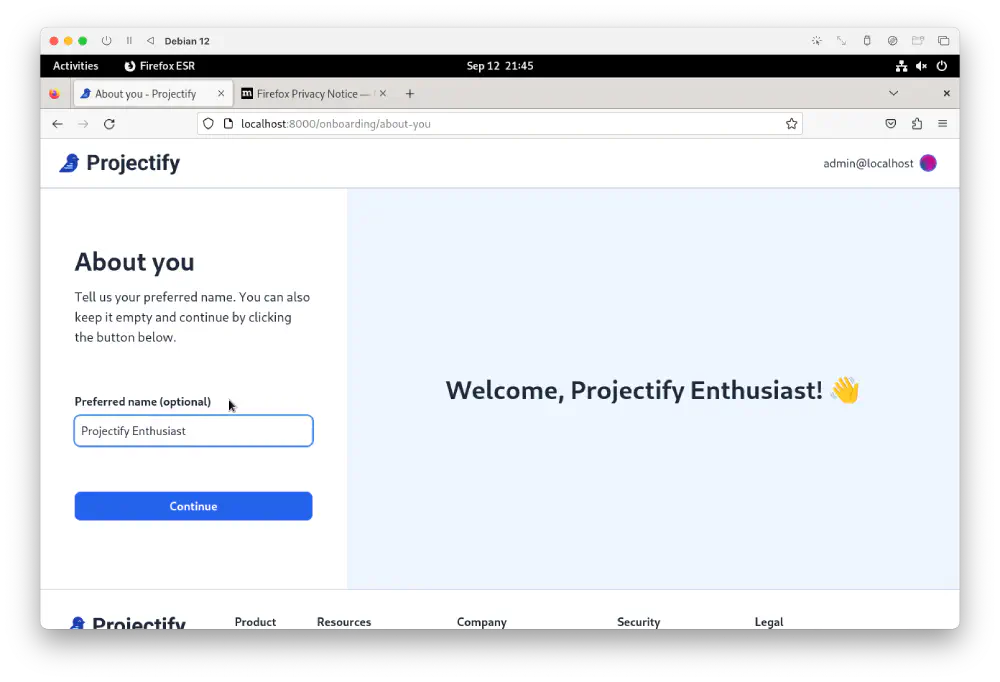
Finish the onboarding steps to access your workspace Open in new tab (full image size 90 KiB)
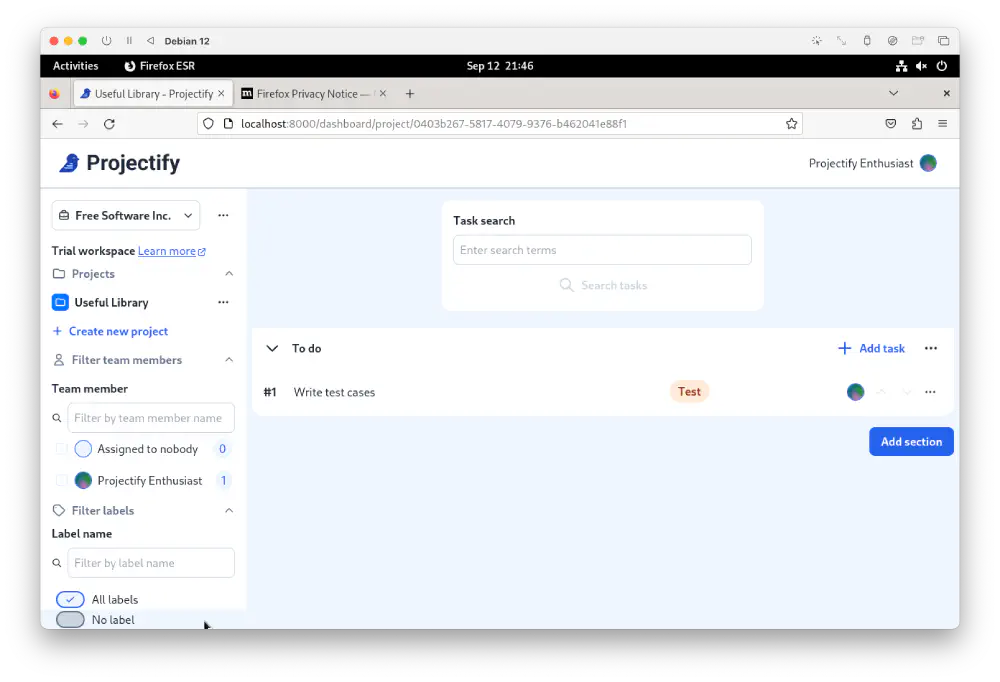
Screenshot of workspace after onboarding has completed Open in new tab (full image size 103 KiB)
If you would like to unlock all workspace features for your newly created workspace, you can create a coupon code in the administration panel.
To access the administration panel, go to the following address: http://localhost:8000/admin/
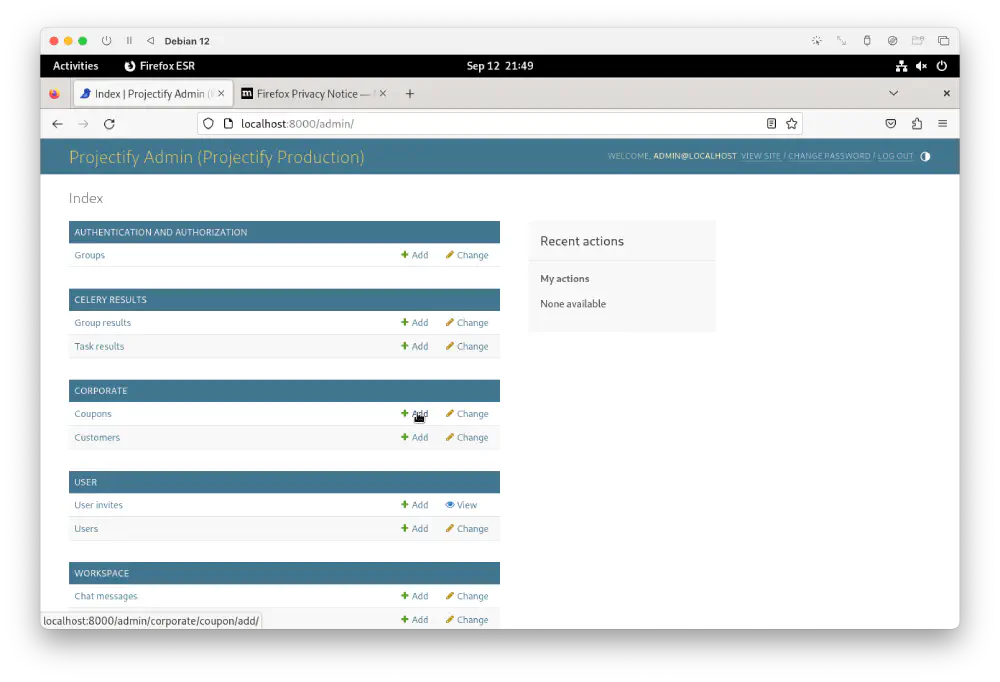
Screenshot of administration panel you see when opening this address in your browser Open in new tab (full image size 97 KiB)
From there, find the coupon creation screen. You can find this screen at http://localhost:8000/admin/corporate/coupon/add/. Using this form, you can create a coupon code.
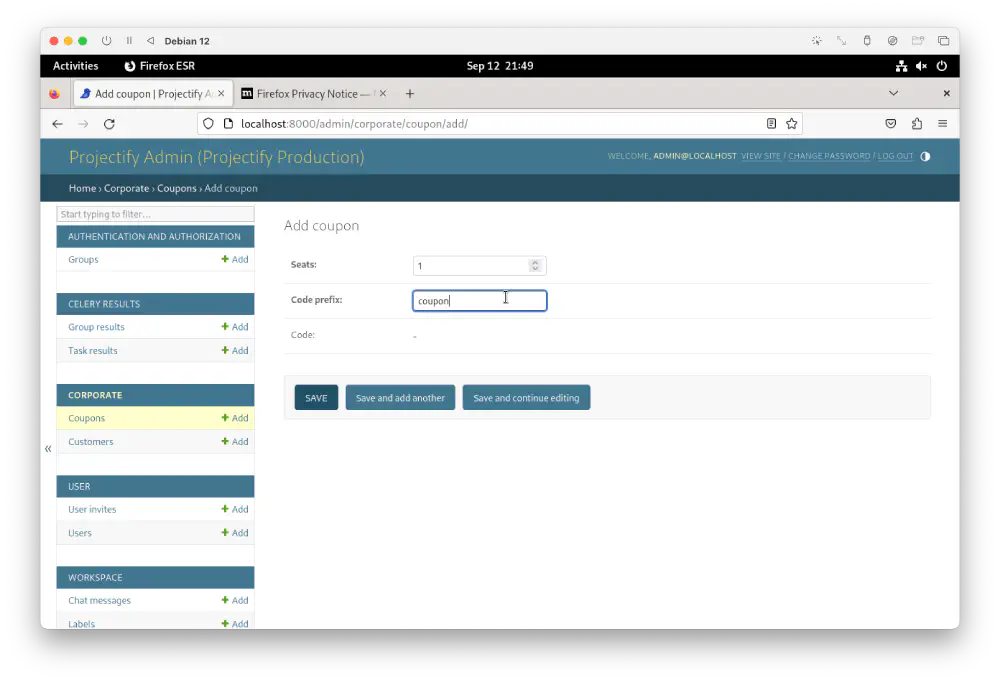
Screenshot of coupon creation form Open in new tab (full image size 98 KiB)
Once you press Save, Projectify redirects you back to a list of all existing coupon codes.
Copy the resulting coupon code. It has the format XXXXX-YYYYYY.
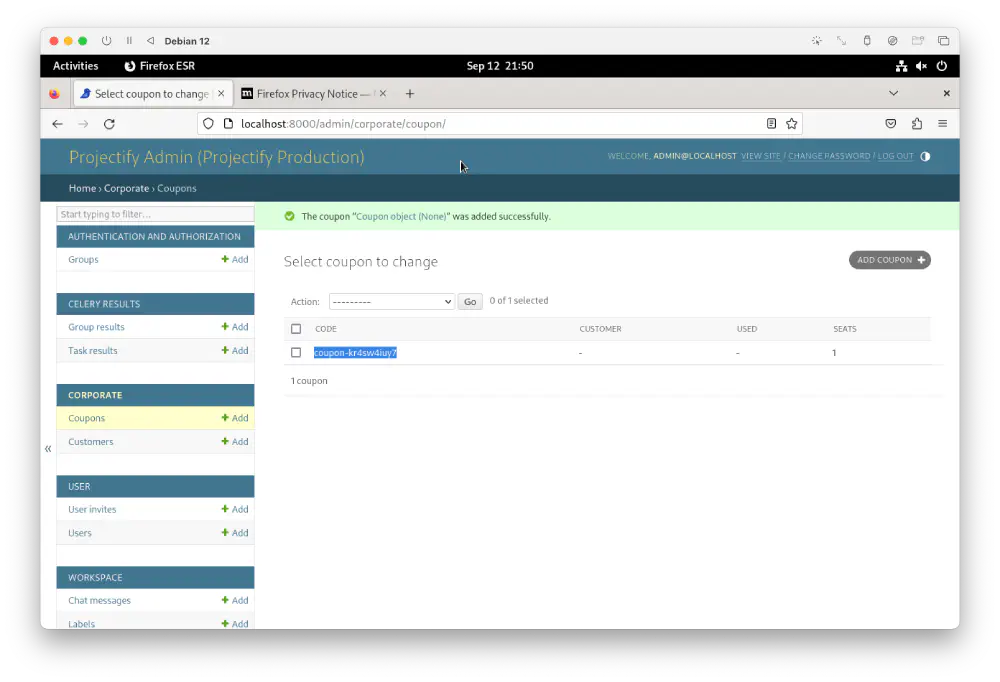
Screenshot of the resulting coupon code in the administration panel Open in new tab (full image size 101 KiB)
Go to your workspace settings by using the side navigation menu on the left.
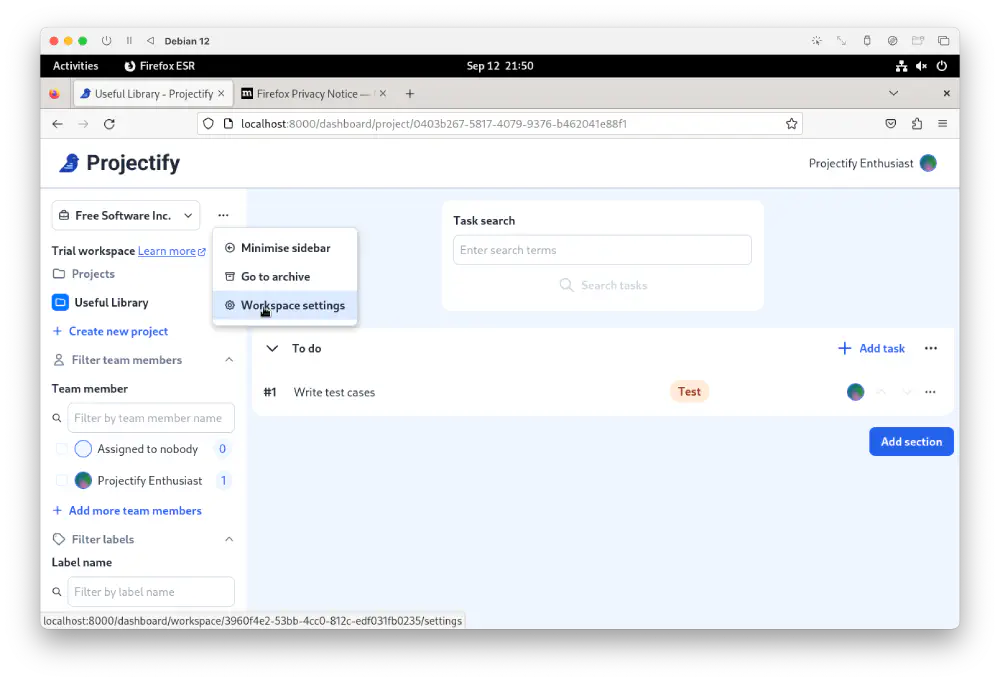
Screenshot showing the side navigation menu with the workspace settings link. Note the Trial workspace notice. Open in new tab (full image size 113 KiB)
Within the workspace settings, select the Billing tab.
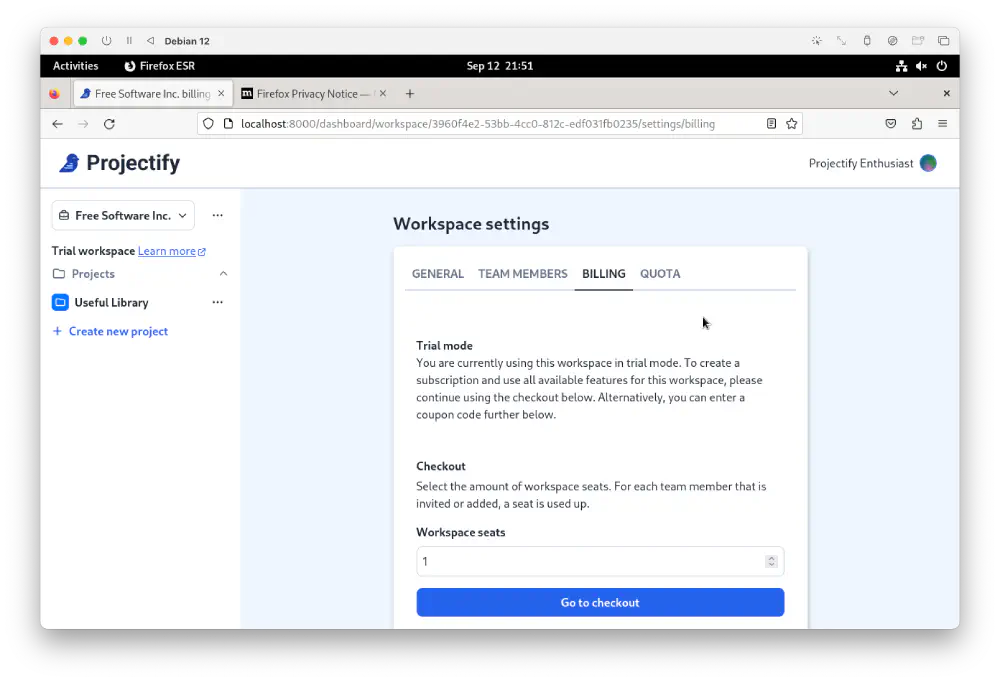
Billing settings opened up Open in new tab (full image size 114 KiB)
Scroll down in the billing tab and enter the coupon code that you have copied after creating.
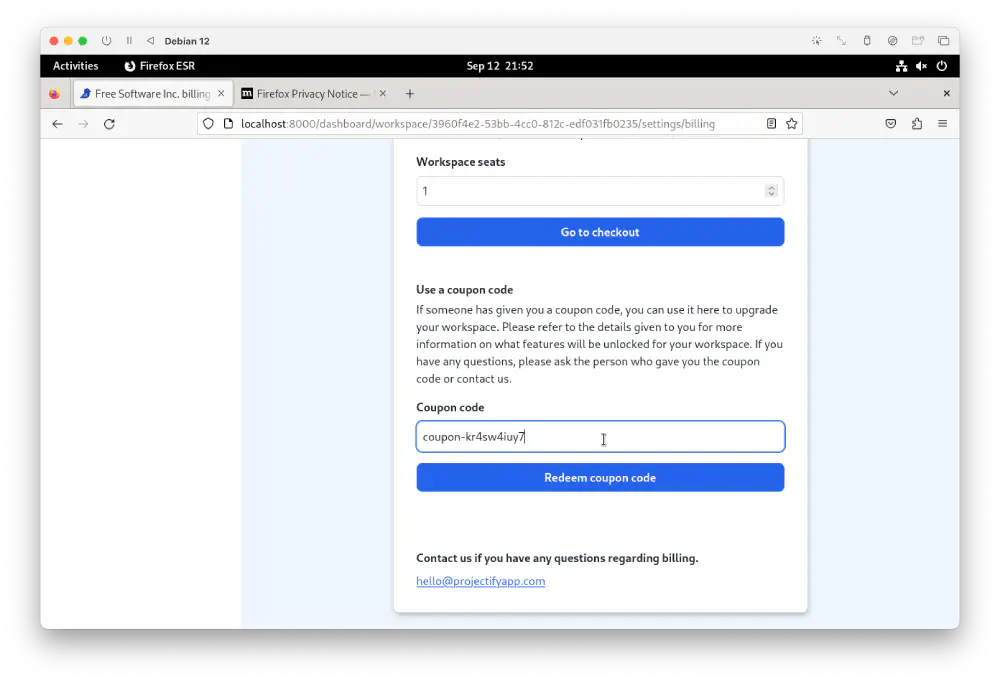
Coupon code entry form Open in new tab (full image size 106 KiB)
Submit the coupon code by pressing the submit button. Refresh the page with
CTRL-R or F5 and your workspace should have all trial restrictions removed.
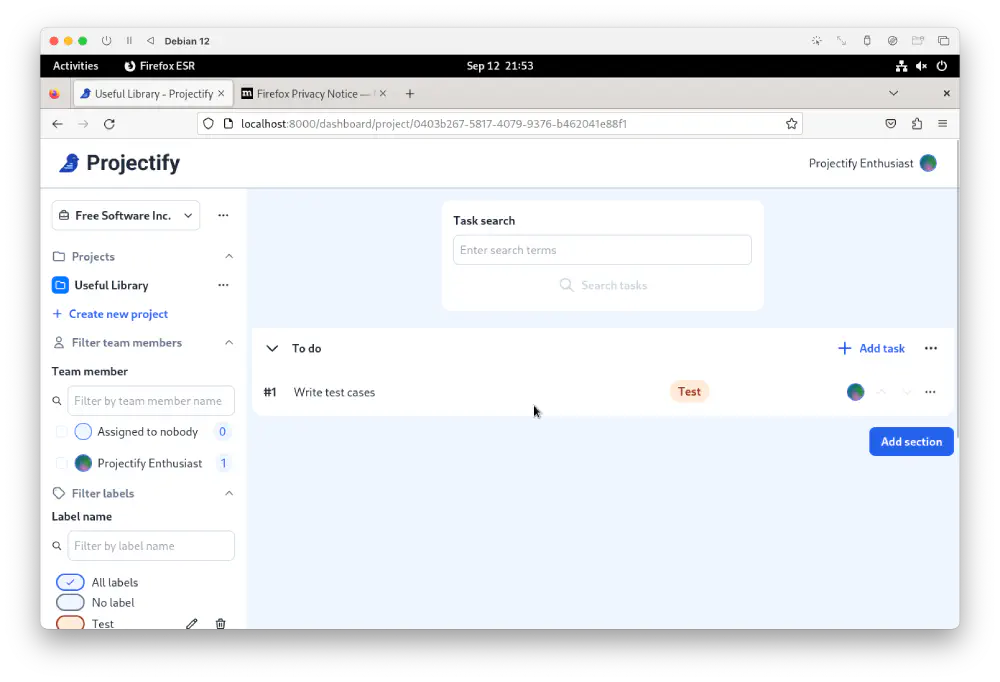
Workspace with no trial notice visible in the side navigation Open in new tab (full image size 101 KiB)
Conclusion
You can now use the Projectify project management app on your Debian computer. On your Debian computer, you can use Projectify offline without the Internet.
You can complete all steps, except for accessing the Projectify frontend from a browser, on a VPS through an SSH connection. You can deploy and maintain Projectify on your own servers.
You can add Projectify to your company’s intranet and invite more users to use Projectify as well.
Please keep up to date with any Projectify changes and make sure to update your local environment as well. Some updates to Projectify may contain security related updates.
If you have any questions about the installation process, please reach out to using the Projectify contact page.